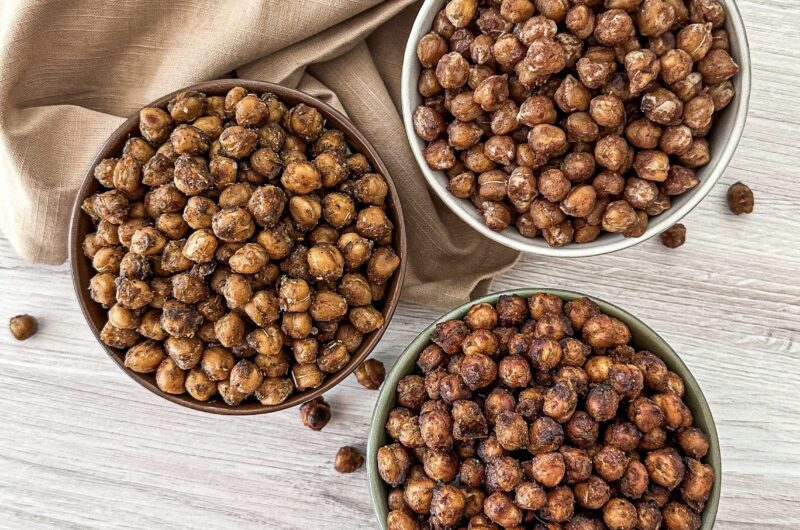
Ever tried making roasted chickpeas? If not, you’re in for a delicious surprise! We’re big fans of chickpeas at ThatSaladLady.com, especially when they bring a satisfying crunch and a heap of health benefits to our salad bowls. Besides being loaded with vitamins, minerals and dietary fiber, they’re an excellent source of plant-based protein too. Plus, they’ve got a tasty nutty flavor and a creamy texture that’s hard to resist.
But here’s the cool part: when you cook chickpeas in different ways, they transform into something extraordinary. That’s why we’re excited to introduce you to three fantastic roasted chickpea recipes that’ll make you crave these little legumes. Whether you’re into tangy and spicy toppers, savory barbecue flavors or sweet and salty snacks, you’ll love what we have in store for you. And the best part? These recipes are super easy to make!

THE BALANCING ACT
Chickpeas, also known as garbanzo beans, are like tiny nutritional powerhouses. You can find them conveniently in cans or bags at your local grocery store. You might be surprised to see that we recommend using canned chickpeas for our recipes. But here’s a little secret: when it comes to nutrition, there’s not much difference between canned and dried chickpeas, except for the sodium used in canning.
Whether you choose canned or dried chickpeas, adding them to your bowls is a smart move for your health. Chickpeas are great for digestion and help maintain healthy blood sugar and cholesterol levels. If you opt for canned chickpeas, simply go for the ones with lower sodium or no added sodium. If you can, consider organic chickpeas. And remember to give them a good rinse and drain; it’s an easy way to reduce the sodium content in canned chickpeas.

Now that we’ve talked about the goodness of chickpeas, let’s dive into the delicious ingredients that make our roasted chickpea recipes so special.
The Essential Wet Ingredients
In each of our chickpea recipes, the wet ingredients play a crucial role in infusing our creations with fantastic flavors, textures and nutritional benefits.
For our Lemon Pepper Chickpeas, we introduce the fruity, pepper flavor of extra-virgin olive oil (EVOO) and the zesty punch of lemon juice. These ingredients do more than just deliver a delightful tang; they also contribute healthy fats and a burst of refreshing citrus goodness to the mix. Then there’s our Savory Barbecue Chickpeas, which include the mild, buttery flavor of avocado oil. This addition not only imparts a savory taste but, much like EVOO, provides beneficial fats that are good for your body.

But the flavor journey takes an exciting twist with our Sweet and Salty Chickpeas. We bring in the subtle sugariness of maple syrup and a hint of pure vanilla extract, resulting in a harmonious blend of rich, sweet flavor that’s simply irresistible. Now, what makes our sweet and salty chickpeas truly unique is the inclusion of aquafaba, which is basically the liquid found in the chickpea can.
What sets aquafaba apart is its ability to act as a binding agent, naturally “sticking” ingredients together. It’s a versatile ingredient that can even replace the oils in our other chickpea recipes, making it an excellent choice if you follow an oil-free diet. Do note, however, that aquafaba may not coat the chickpeas as evenly as oil would since it’s a bit thinner and has a higher water content. This can result in chickpeas that are slightly less crispy when roasted. Just give it a try and see what you think. If your diet isn’t oil-free, you can always use an oil for your next batch.

Dry Seasonings for the Perfect Finish
Each of our roasted chickpea recipes is uniquely flavored with a variety of dry seasonings, which are the key elements that distinguish one recipe from another.
Our Lemon Pepper Chickpeas create a zesty flavor blend. They feature smokiness and sweet pepperiness from paprika, an earthy aroma and antimicrobial goodness from oregano, a fragrant minty note from dried thyme, a warm, nutty vibe from ground cumin, robust and punchy character from garlic powder, fresh herbaceousness from dried dill, and a subtle kick from ground black pepper. You can add cayenne pepper too for extra spice. All these flavors get a perfect balance from kosher salt.

With our Barbecue Chickpeas, it’s all about savory richness. You get a good dose of sweetness from brown sugar (or a vegan-friendly option like coconut sugar), deep smokiness from smoked paprika, robust spiciness from chili powder, bold savory notes from garlic and onion powder, sweet oniony touches from onion powder, tanginess and complexity from mustard powder, a hint of freshness from parsley, and a mild kick from pepper. Again, kosher salt is there to enhance all these flavors.
The simplest of the three, our Sweet and Salty Chickpeas offer a warm, slightly spicy flavor of cinnamon, celebrated for potential health benefits. Finally, kosher salt is there to bring that key balanced “saltiness” to the blend.

In addition to these flavorful dry seasonings, we include corn starch as a coating for the chickpeas. Corn starch adds crispiness during roasting, giving you that perfect crunch, and it also acts as a binding agent to make sure the seasonings stick for maximum flavor. If you prefer an alternative to corn starch, tapioca flour is an excellent choice. It serves the same purpose of providing crispiness while being gluten-free, making it a suitable choice for gluten-free diets.
START MIXING
To begin, you’ll need three 15-ounce cans of chickpeas – one for each recipe. If you’re making one recipe at a time, focus on one can. Before mixing in the seasonings, you’ll want to give the chickpeas a good rinse and drain them well. Don’t forget to save that aquafaba (the liquid from the can) if you plan to use it. From there, pour the drained chickpeas on to a plate lined with paper towels or a clean kitchen towel and gently pat them to remove any lingering moisture.

Properly dried chickpeas will result in a crisper final product, as excess moisture can prevent them from achieving the desired texture during roasting. To further enhance the texture, we also suggest removing the skins from the chickpeas. You can do this by giving them a vigorous rub until the skins start coming off. While you don’t have to remove all the skins, roasted chickpeas taste so much better when you do.

Once the chickpeas are nice and dry, transfer them to a bowl, and begin coating them with EVOO, avocado oil or aquafaba, and incorporate any additional wet seasonings, depending on the recipe (see recipe card). Once the chickpeas are well coated, add their respective dry seasonings. This is where you can incorporate the cornstarch (or tapioca flour), which will provide that crispy coating to the chickpeas.

Start with one tablespoon of cornstarch or flour per 15-ounce can of chickpeas, and adjust the quantity based on your preferred level of crispiness. Some enjoy their roasted chickpeas super crispy, while others prefer a slightly softer texture. Feel free to experiment until you find the perfect balance. The final step here is to toss the dry chickpeas into the mixture, ensuring each chickpea is thoroughly coated.

GET COOKING
We include instructions for roasting the chickpeas using both an oven and an air fryer. If you happen to have an air fryer, we highly recommend using it for this step!

However, if you’re using the oven, the process is pretty straightforward too. Simply line a rimmed baking sheet with parchment paper or foil, then spread the seasoned chickpeas evenly on the lined baking sheet. You’ll want to roast them at 400 degrees F for about 20-30 minutes, tossing them around halfway through to ensure even roasting.

If you use an air fryer instead, just spread the chickpeas in a single layer in your basket or rack and roast them at 380-400 degrees F for 10-15 minutes, shaking or tossing them halfway through the cooking time for even browning. Keep a close eye on the chickpeas during the last few minutes of cooking to prevent them from over-browning or burning.

Whether you choose the oven or the air fryer method, keep roasting until the chickpeas turn a beautiful golden brown and achieve that delightful crispiness. Perfectly roasted chickpeas will be dry on the outside but soft on the inside. Allow the roasted chickpeas to cool completely at room temperature.

The Versatility of Roasted Chickpeas
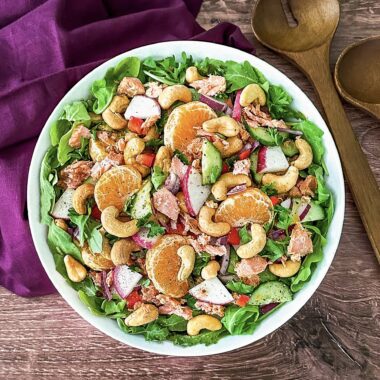
When it comes to salad making, these three roasted chickpea recipes are incredibly versatile. Try them to add delightful crunch to our simple Chickpea Salad or experiment with other bowl recipes here at ThatSaladLady.com. Besides making tasty salad toppers, roasted chickpeas also make for a great plant-based snack.

Each roasted chickpea recipe yields four delicious servings. We suggest storing any leftovers in a sealed and airtight container. It’s important to ensure that there’s no moisture inside the container, as it can make the chickpeas lose their crispiness. You can add a small piece of parchment paper at the bottom to help absorb any excess moisture.

Roasted chickpeas are best stored at room temperature. Storing them in the refrigerator can cause moisture to build up and ultimately affect their texture. To fully enjoy their crunchiness and flavor, we suggest consuming roasted chickpeas within a week of making them.
SHOW US YOUR WORK
That Salad Lady wants to see all your great work. If you enjoy any or all of our roasted chickpea recipes, which we are quite sure you will, drop a comment below and tag pics on Instagram (@that.salad.lady) and TikTok (@thatsaladlady). Add the hashtags #thatsaladlady and #buildyourbowl too. If you really love them, pin it on Pinterest and share it on Facebook using #thatsaladlady.
Lemon Pepper Chickpeas
Savory Barbecue Chickpeas
Sweet and Salty Chickpeas
This information is provided as a courtesy and is only an estimate. Please review our full disclaimer to get a clear understanding of the nutrition and health information and resources presented and written on our website.


